On your stream
8 min
Add an overlay to OBS or Streamlabs
Add a saved HeatCheck URL as a browser source, use the preset’s exact canvas size, and verify it with a live test show.
Before you start
You need an overlay built and saved. If you have not made one yet, build one first— this page picks up from its setup card.
Have OBS Studio or Streamlabs Desktop open, on the scene you want the graphic to appear in. Both apps work identically here; where the wording differs, OBS is given first.
Do this before the show, not during
Copy the URL and the size
Find your overlay in the list and open it. The setup card shows three things you are about to need: the URL, a width, and a height. The two numbers are fixed by the shape you chose.
Lower third
Bottom edge
- 1920 × 220
Corner card
Any corner
- 480 × 320
Side panel
One side
- 520 × 760
Full-height rail
Flush to an edge
- 420 × 1080
Half screen
One half
- 960 × 1080
Full screen
Its own scene
- 1920 × 1080
Copy the URL from the app, never retype it
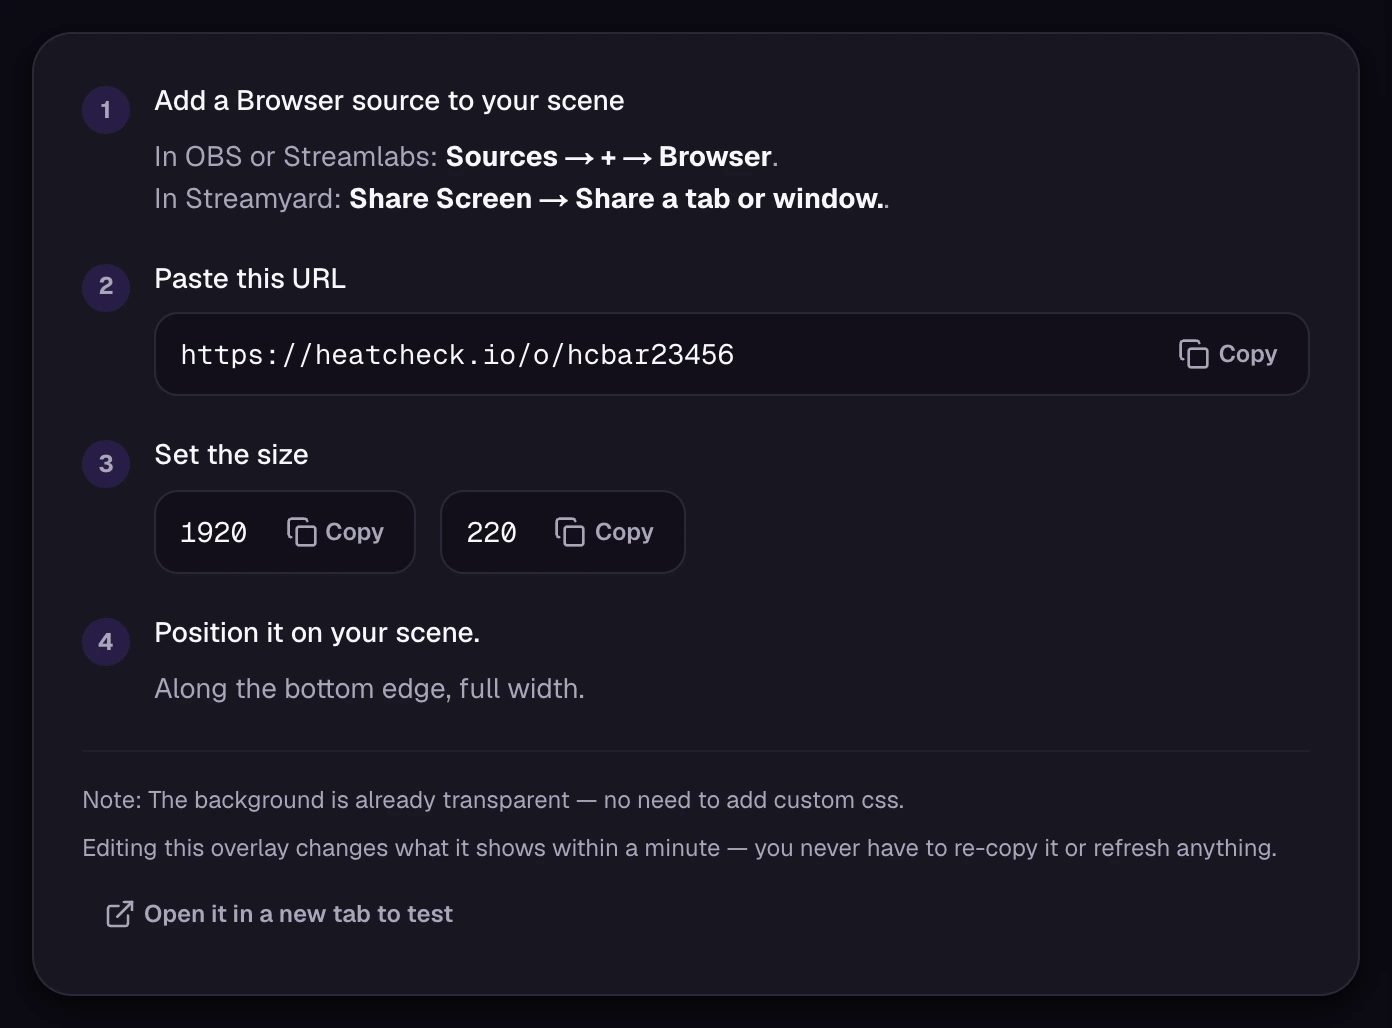
Add the browser source
- 1
Create the source
In OBS, with your scene selected: Sources+Browser
In Streamlabs, the same control is Sources+Browser Source
Choose Create new, give it a name you will recognise in the source list — “HeatCheck lower third” — and press OK.
- 2
Paste the URL
Clear whatever is in the URL field (OBS pre-fills it with its own welcome page) and paste yours in its place.
- 3
Set the width and height
Type the two numbers from the setup card into Width and Height. For a lower third that is:
Width
1920
Height
220
This is the step people get wrong
These fields set the size of the page, not the size of the graphic on your canvas. Leaving OBS’s default 800 × 600 on a 1920-wide lower third does not shrink the overlay — it renders a different, cramped layout and then scales it up, and the text goes soft. Set the numbers here; resize on the canvas afterwards if you need to. - 4
Leave every other setting alone
The defaults are correct. In particular you do not need custom CSS, and you should not add a chroma key or colour-key filter — the overlay is already transparent.
Press OK.
Screenshot
The OBS Browser source properties dialog with the HeatCheck URL pasted and Width/Height set to 1920 × 220.
Position it
The source appears on your canvas. Drag it where it belongs — each shape is designed for a particular place:
Lower third
- Along the bottom edge, full width.
Corner card
- Any corner — top-right keeps it clear of most webcam frames.
Side panel
- Down one side, vertically centred.
Full-height rail
- Flush against the left or right edge, top to bottom.
Half screen
- One half of the screen, with your video scaled into the other.
Full screen
- Fills the canvas. Give it its own scene.
Hold Alt to crop, not to resize
Check it works
Off air, an overlay is mostly quiet by design — so a blank source is not proof of a problem. Test it properly:
- 1
Check the builder preview
Open the full-size preview and confirm the arrangement, order, color mode, and backdrop. It uses sample data when you are off air, so every enabled widget can be inspected.
- 2
Go live on a test show
Start a draft, press Go live, and watch the OBS source fill with the actual room. Open a poll or roll call if those widgets are part of the arrangement.
- 3
Vote from your phone
Open your page, drag the slider, and watch the gauge move in OBS. That is the whole chain proven end to end.
When something looks wrong
The source is completely blank
- Are you live? Most widgets have nothing to draw off air. The join call-to-action and your logo are the two that always render — add one temporarily if you want a visible smoke test.
- Does the URL work in a browser tab? If it does not, the code was mistyped or the overlay was deleted.
- Every widget switched off? An overlay with nothing enabled is an invisible source, correctly.
Part of it is missing
Widgets that depend on a feature drop out when that feature is off. A roll-call widget shows nothing until roll call is switched on for that show; suggestions and polls behave the same way. The logo widget renders nothing until you upload a logo in Custom Branding.
The text is small, or the layout looks cramped
The Width and Height in the browser source do not match the preset. Fix the numbers rather than resizing on the canvas — the layout is chosen from the page size, so the wrong numbers produce a genuinely different design.
It has a black or white box behind it
Check the overlay’s Backdrop. Solid intentionally fills the whole source; choose None for a transparent canvas or Scrim for local contrast behind widgets. The saved change reaches OBS within about a minute.
It froze on something old
Right-click the source and choose Refresh. If it happens repeatedly, check the machine has not lost its network connection — the overlay reconnects on its own, but it will hold the last frame it drew while it cannot reach us.
You never need to re-add a source after editing an overlay
Explaining this to someone who does not use HeatCheck yet? Bring your audience’s live reaction into the broadcast is the same subject written for them.