Getting started
10 min
Your first show
Create a host page, start a draft, test the live room, and end your first show without setting up streaming software.
Before you start
You do not need OBS, a sponsor, or an audience for this walkthrough. Open your public page on a phone or in another tab and act as the first listener yourself.
Set aside about ten minutes. Your host page remains available after the test, and you can edit its show settings later. Ending the test show keeps it in your history and analytics like any other show.
Claim your handle
- 1
Create the account
Open the signup page and continue with Google, or enter an email and password. Both paths land in the same place afterwards — setup starts as soon as the account exists.
- 2
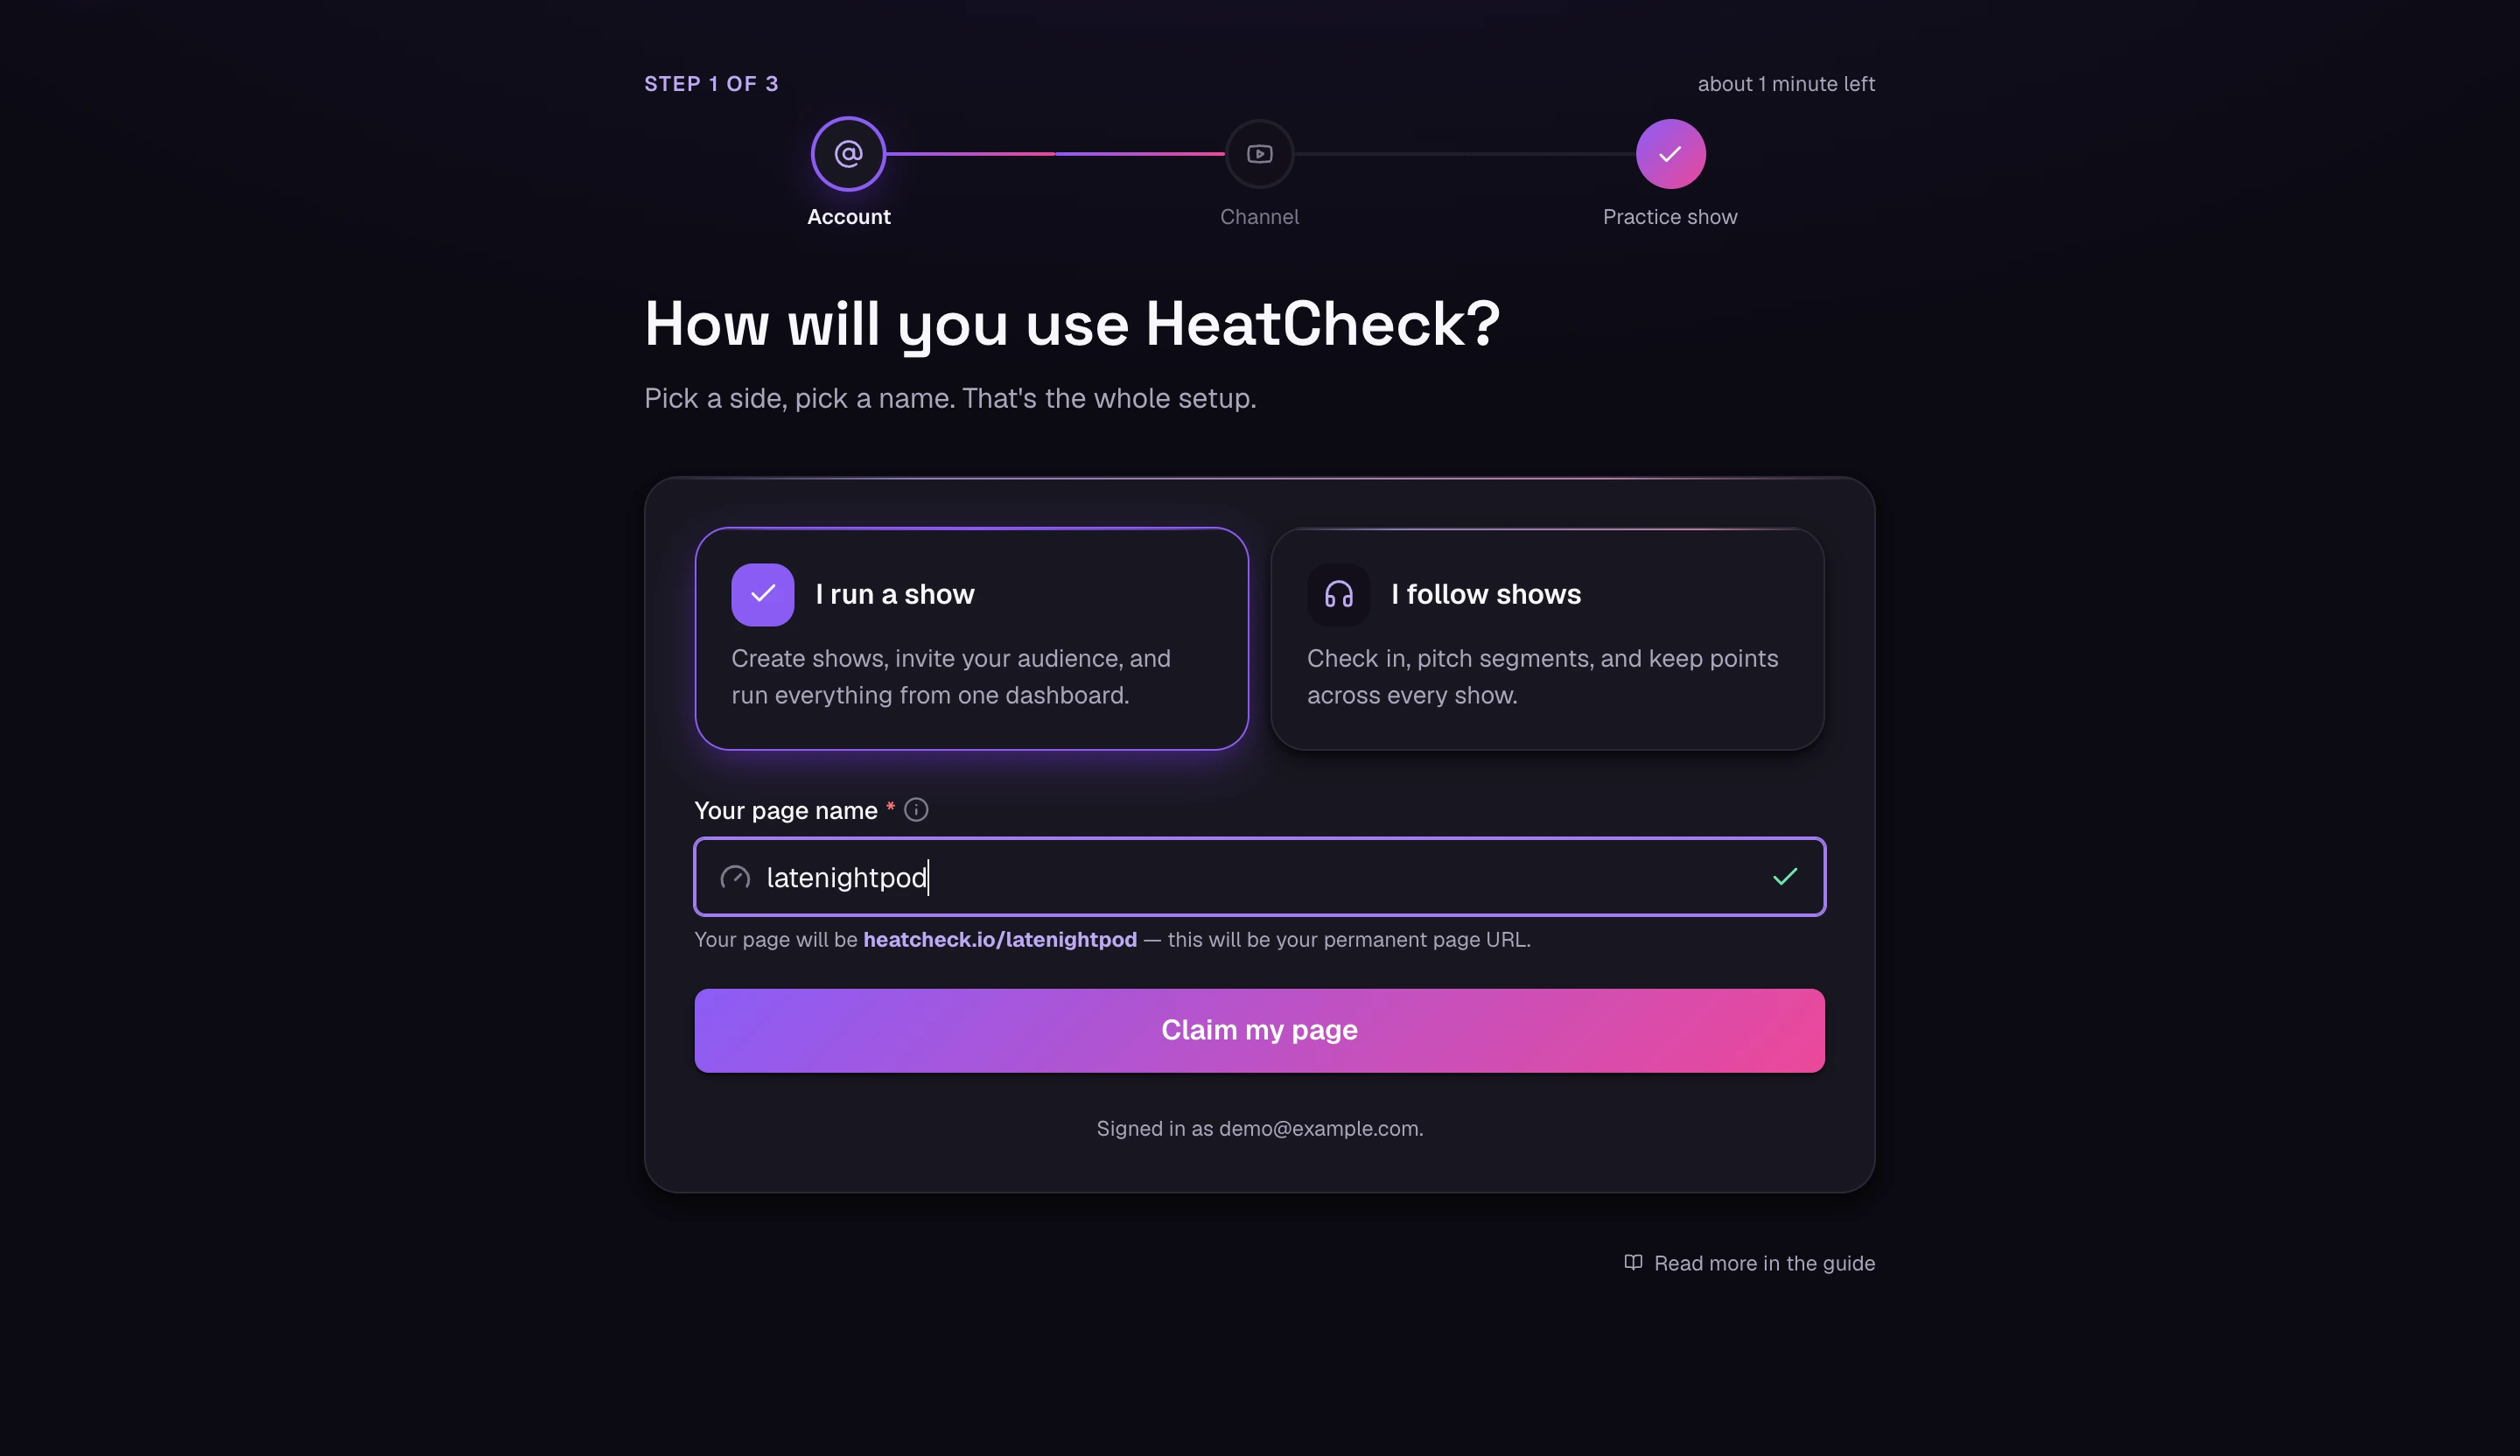
Choose “I run a show”
The first step of setup asks which side you are on. A listener account can vote and join audience features, but it cannot own a public page or run shows.
- 3
Choose your page name
Same screen, right underneath. This becomes your permanent public address: heatcheck.io/your-page-name. Use your existing channel handle if it is available. Page names use lowercase letters, numbers, and hyphens; choose one that is easy to say on air. HeatCheck checks availability as you type and suggests alternatives if the one you want is taken.
This is hard to change later
Your handle is printed on overlays, QR codes and anywhere you have shared the link. Treat it like a channel name rather than a display name.
Create a show
After you claim your page name, setup offers three more steps — connecting your YouTube channel, choosing a plan, and a practice show. Every one of them can be skipped, and anything you skip waits for you as Finish setting up on Your shows. Everything else — your colors and logo, which audience features are on, overlays for your streaming software — lives in Settings and is there whenever you want it.
Your shows lists your drafts, live shows, and completed shows; it is empty on day one.
- 1
Press “Start new show”
This creates a draft and opens its dashboard. You can configure the draft at your own pace, and it does not appear on your public page until it goes live.
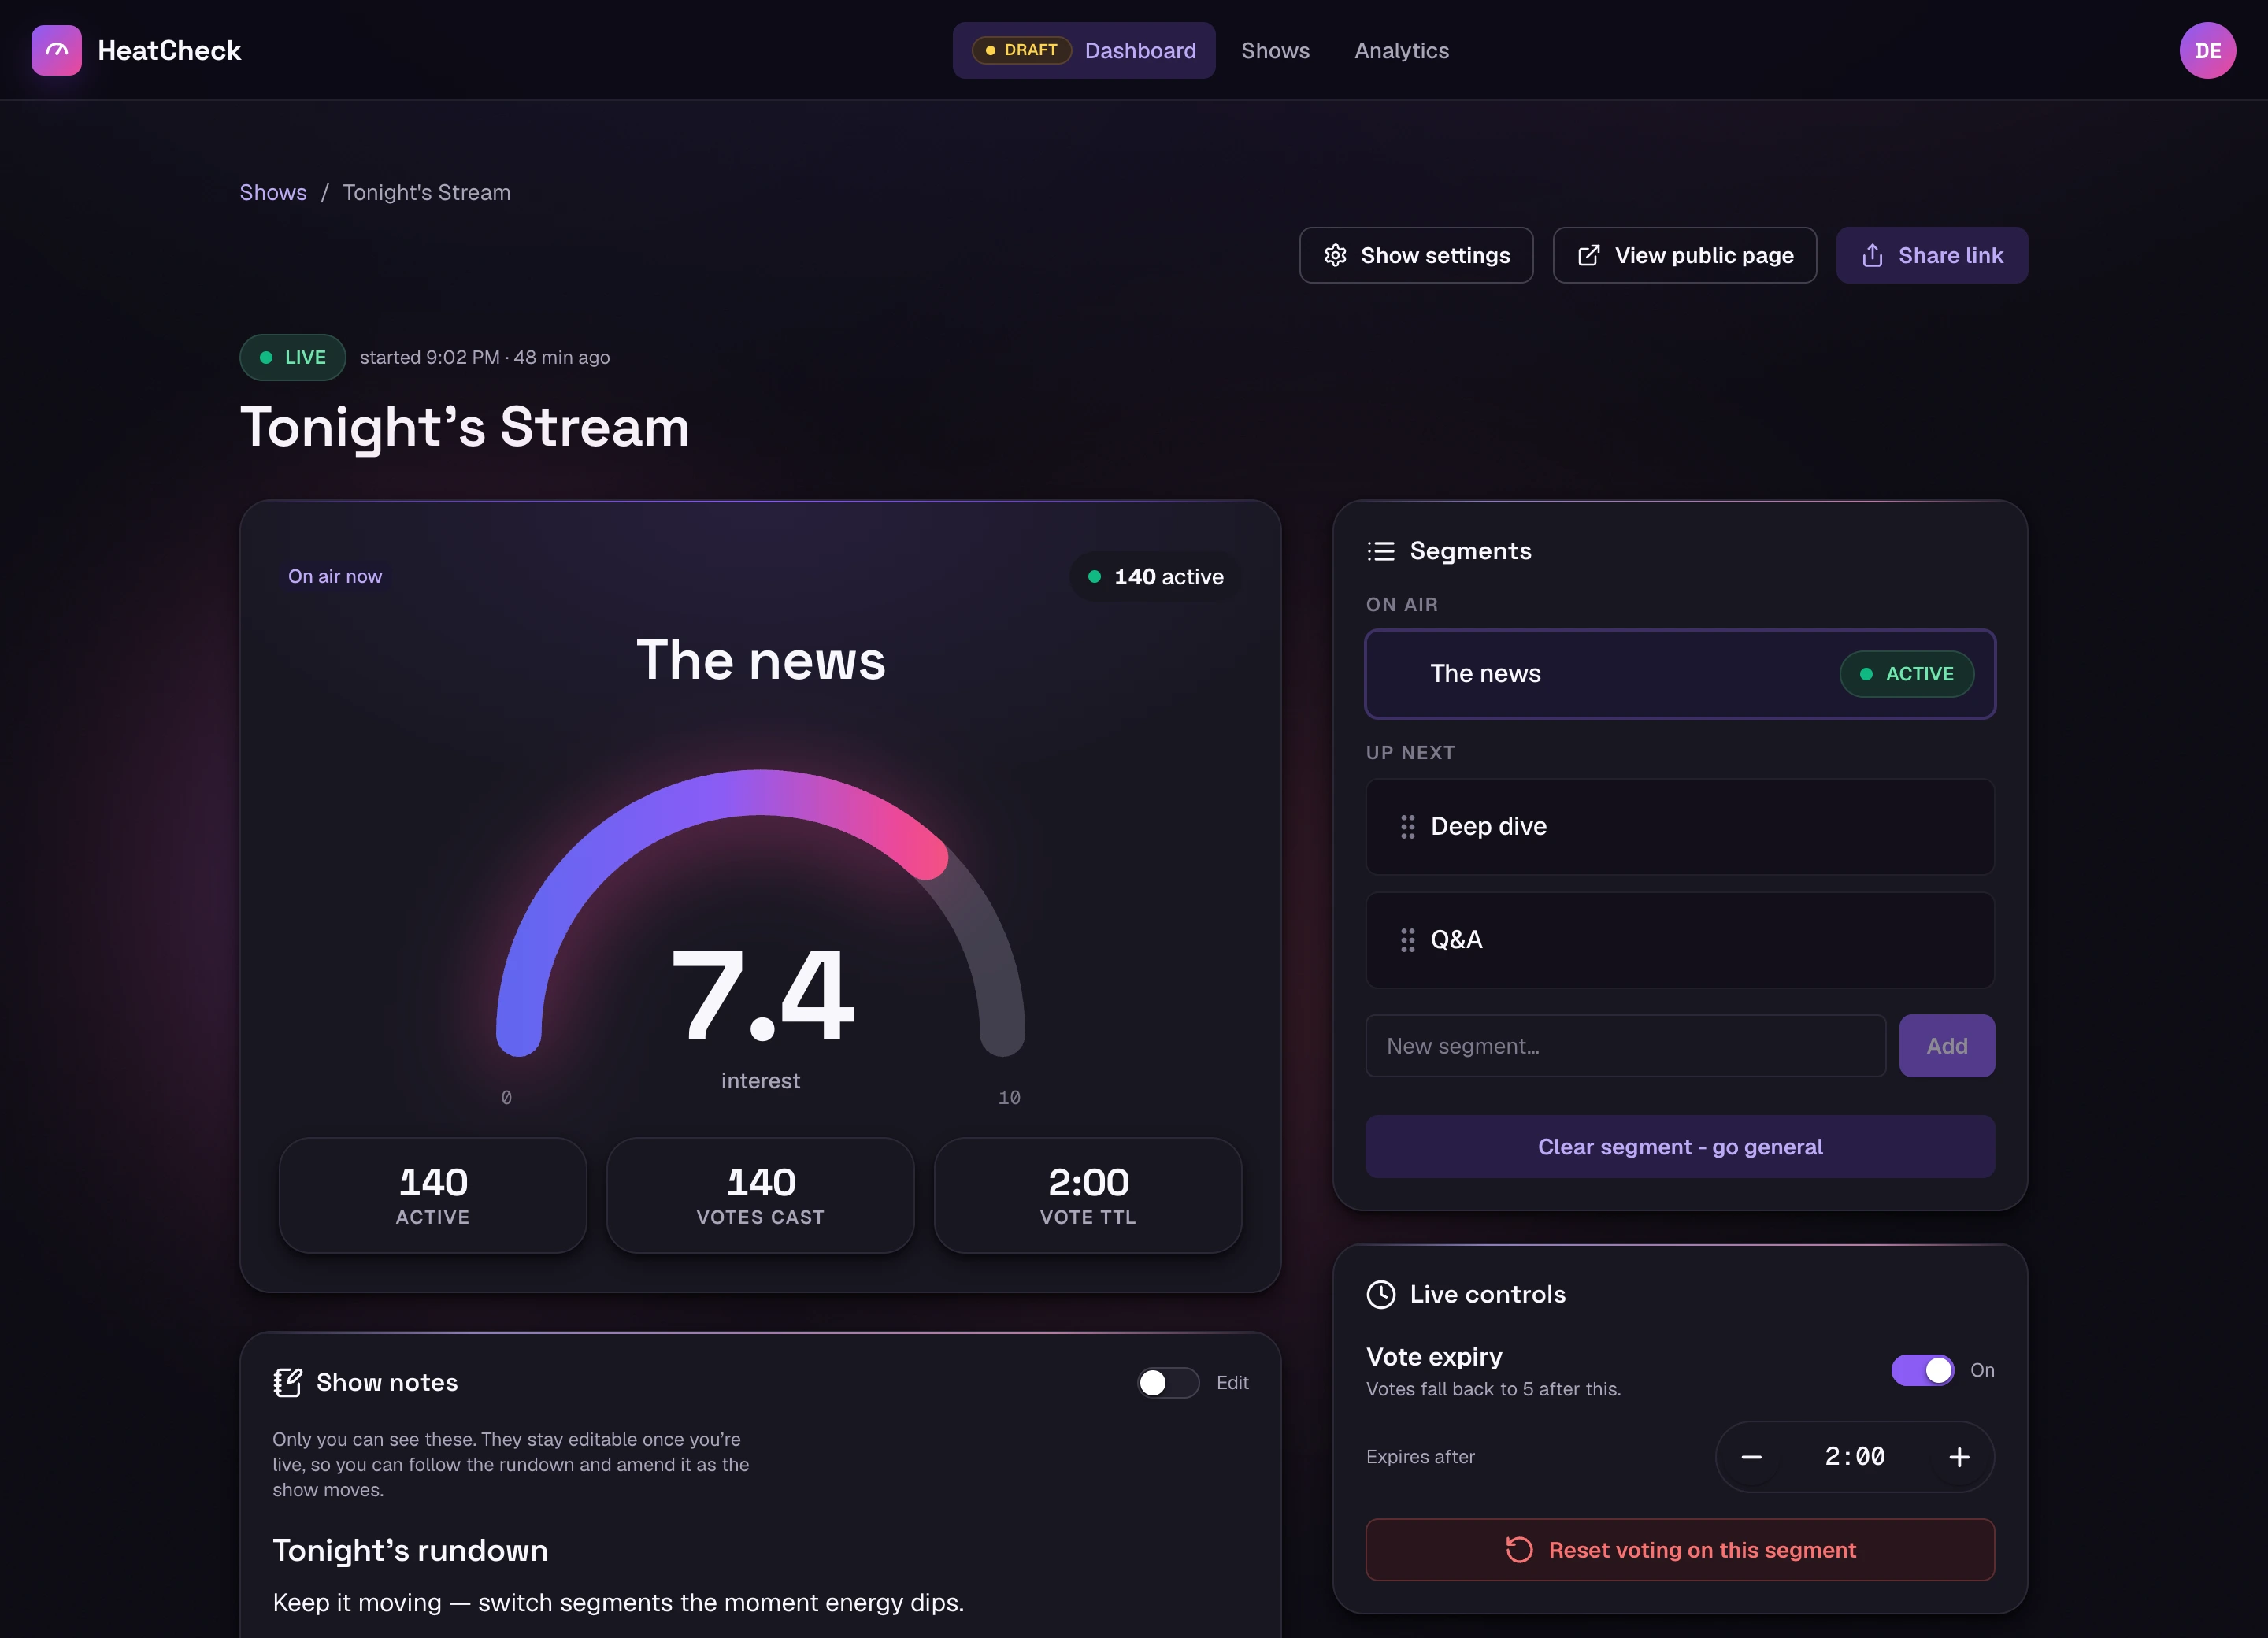
On your very first show the dashboard starts deliberately bare — only Live controls and Show notes are switched on, which between them is everything you need to run a show. A short tip opens the panel list and shows you where the rest are. Turn any of them on from Show settings, whenever you like, including in the middle of a show.
When you close the tip, a short setup guide offers to walk you through naming the show, planning a segment or two, choosing how long votes count, and going live now or on a schedule, pointing at each control in turn. Skip any step, or the whole guide; nothing in it is required to go live.
- 2
Name it
In Show settings, enter a Show name such as “Friday Night Watch Party” or an episode number. The name is optional, but it makes the show easier to identify in your shows list and analytics.
- 3
Plan a couple of segments (optional)
Add two or three items in the Segment planner. During the live show, you can start those prepared segments without typing their names on air. You can also add segments later while live.
One live show at a time
Go live
- 1
Press “Go live”
Your public page switches from the holding screen to the live room for everyone who already has it open. They do not need to refresh.
- 2
Open your own page on your phone
Go to heatcheck.io/your-page-name on another device or in a second browser tab. Drag the interest slider and watch the dashboard gauge update.
This is worth doing properly on the first run, because it is the only way to see what your audience actually sees.
- 3
Switch a segment
Start one prepared segment, cast a vote, and then start another. Each segment begins with its own score and keeps its own results, which lets analytics compare the parts of the show later.
End the show
In End show, press Stop show and confirm. This closes voting, ends the current segment, saves any roll-call results, and marks the show complete for analytics. A stopped show cannot be reopened.
A show you never end will end itself — eventually
What to set up next
You now have the complete host-to-listener loop working. Add the optional features that support how you run your show.
- Put it on your stream. Build an overlay for OBS, Streamlabs, or Streamyard to show the gauge and other live features inside the broadcast.
- Turn on roll call. Listeners can check in, earn points and badges, and build a history with your channel across shows.
- Set your defaults. Anything you switch on for every show can be saved so that a new draft starts configured.
- Add your branding. Upload your logo and choose an accent color so the page and overlays look like your show.